In a previous article, I outlined why you need a work breakdown structure (WBS) and how to plot a WBS.
Plan, track, and report on project tasks in SharePoint with your free template!
As a recap, the WBS is an outline of project deliverables and the tasks needed to reach these goals. It’s a roadmap to success, helping to increase visibility and tracking.
As mentioned in the article, there are several ways to build, visualize, and manage the WBS, such as a spreadsheet or a SharePoint list.
In this article, I’ll show you how to create your WBS using SharePoint. I’ll also outline two ways to manage more complex schedules: the ‘In-Browser Task Scheduler’ from BrightWork, and the sync between SharePoint and Microsoft Project Professional.
Manage the Work Breakdown Structure (WBS) in SharePoint
Using the OOTB ‘Tasks’ web part, you can easily add a task list to your SharePoint site.
When creating your task list in SharePoint, you can:
- Add key information such as description, owner, due date, status.
- Create sub-tasks.
- Add tasks and milestones to a timeline.
- Edit tasks individually or in bulk.
- View tasks on a Gantt chart.
- Use pre-built views such as Late Tasks and My Tasks.
- Sync tasks to Outlook.
- Set alerts on the list.
- Send email notifications to team members when they are assigned a task.
In the example below, I’ll use the free SharePoint Project Management Template from BrightWork as our starting point. The template ships with a pre-populated task list, mapped to the five stages of collaborative project management:
- Initiate the Project
- Plan and Setup the Project
- Work the Project
- Track and Re- Plan the Project
- Close the Project.
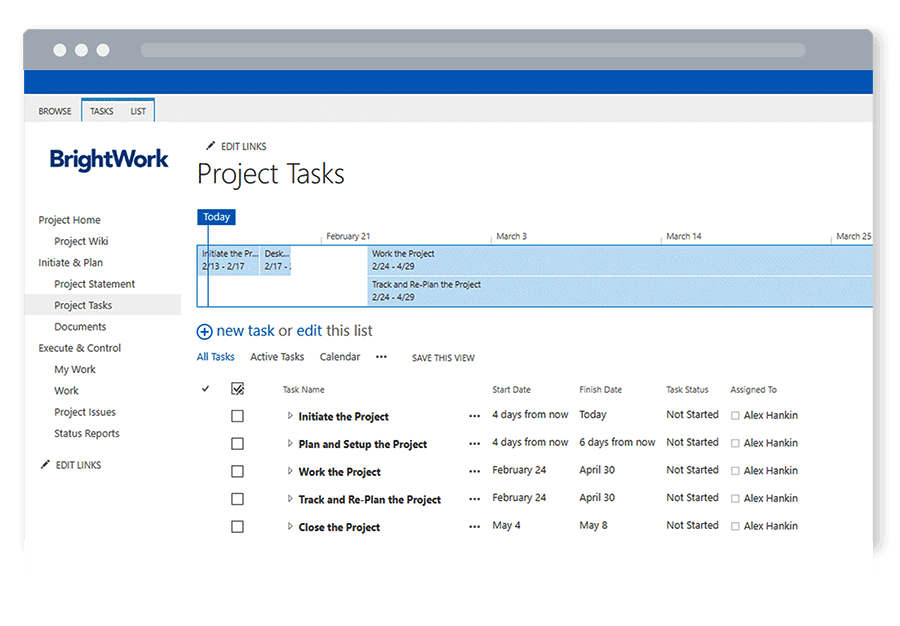
It’s a great way to save time when planning your project!
Assuming you have created your WBS in a Word or Excel document, and have installed the free template, follow these steps to add your WBS to the project site.
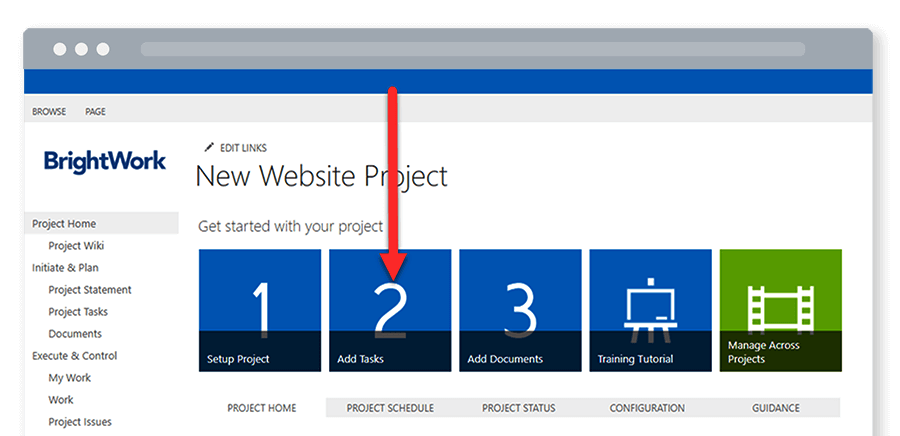
Access the task list by clicking ‘Add Tasks’ on the project homepage (tile 2) or ‘Project Tasks‘ in the Quick Launch menu.
Click ‘edit this list’ to start planning tasks. You can use the pre-populated list or add your own project phases and terminology. For now, just add the various tasks without worrying too much about subtasks. We’ll add these later. In this screenshot, I’ve added the various tasks that will help me to track and re-plan my project.
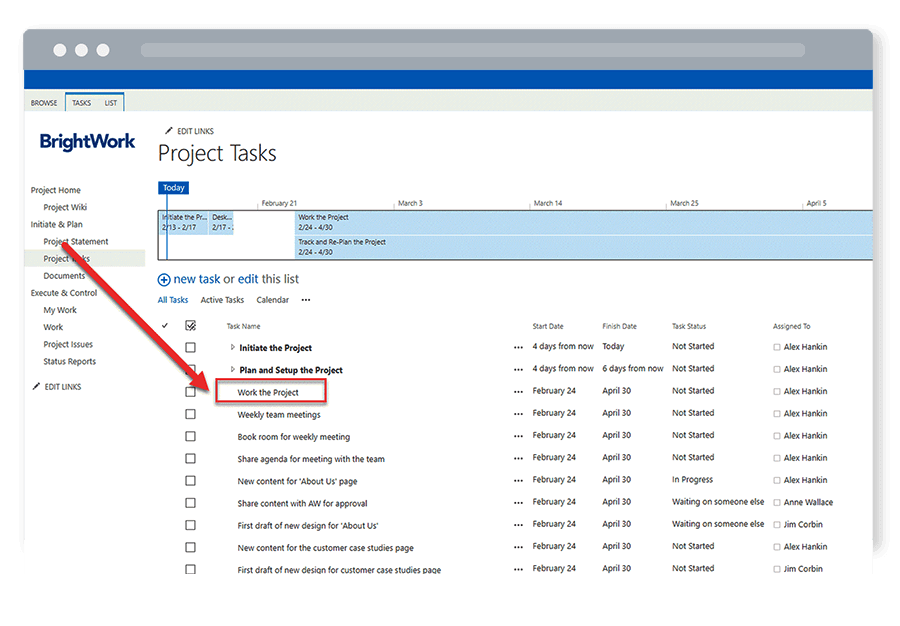
Once you have added the tasks, click ‘stop editing the list’ to save your work.
Next, select ‘Tasks’ in the ribbon. As you can see, there are options to add a task, outdent/indent, and move tasks. We’ll use these features to create the WBS.
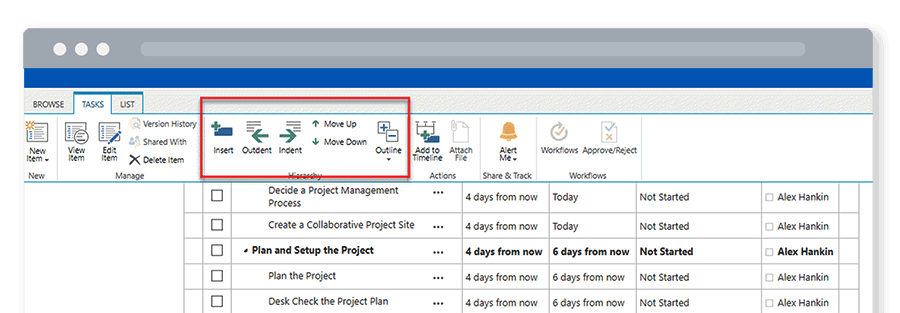
To easily ident tasks for your WBS, select the relevant tasks and click ‘ident’. The main task now appears as bold, with the subtasks listed underneath.
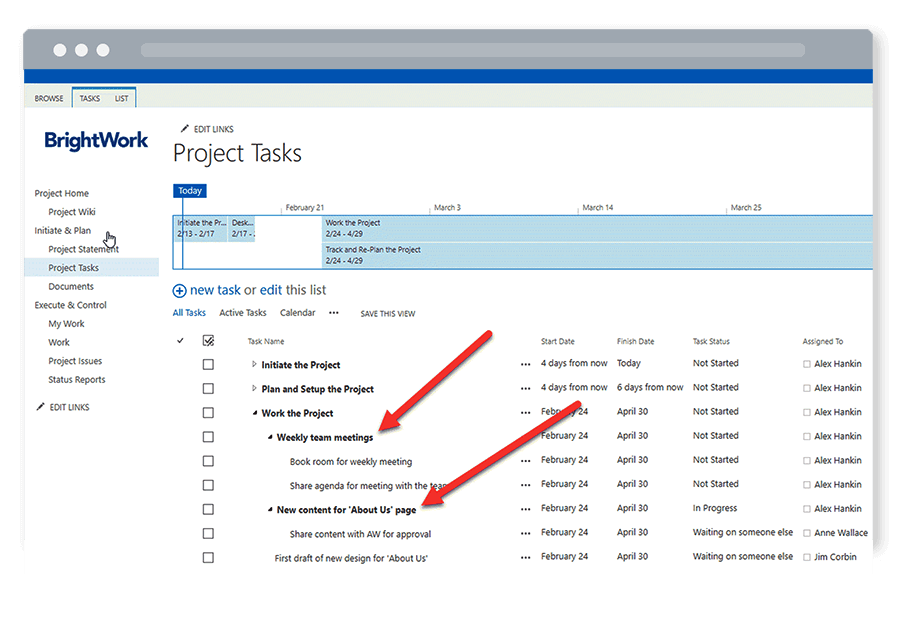
If you decide to change a subtask to a larger item, select the task and click ‘outdent’.
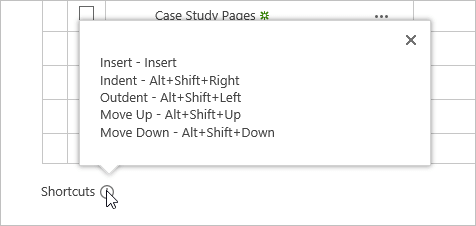
Note – you can also use the keyboard to access these commands – click the Shortcuts link at the bottom of the datasheet to expose the below.
To add tasks to a timeline, right-click the task to open the editing menu and select ‘add to timeline’. Depending on the workload, you may prefer to add just a handful of key tasks for a cleaner timeline.
As you can see, creating and managing a work breakdown structure is very simple in SharePoint – especially if you are using a pre-configured template!
As your team works on the project, update the tasks and schedule regularly.
Manage Complex Work Breakdown Structures with BrightWork and MS Project
Depending on the size and complexity of your project, you may need some additional tools to manage tasks. In this section, I’ll show you how to use the In-Browser Task Scheduler from BrightWork and the sync with Microsoft Project Professional.
1. In-Browser Task Scheduling with BrightWork
If you are using the full BrightWork PPM solution for SharePoint, you can leverage the In-Browser Task Scheduler to manage and update the plan.
The lightweight scheduling capability allows you to calculate a simple project schedule in your browser, so you know when the project is going to start and finish.
- In your project site, create the work breakdown structure with tasks and subtasks as per the steps above.
- Click the ribbon to access ‘Tasks’ and select ‘Calculate Schedule’.
- You can also update or change the schedule with ‘Move Schedule’.
2. Sync with Microsoft Project Professional
For complex projects, the Project Structured Template in BrightWork supports a bi-directional sync with Microsoft Project Professional.
Any changes you make to the project plan in MS Project Professional are reflected in your BrightWork project site. Likewise, any updates made by the team in BrightWork are synced with your MS Project site.
This reduces the need to buy multiple, expensive licenses for MS Project whilst also maintaining control over the schedule.
The option to use this sync is located under ‘Lists’ on the ribbon. Click ‘Open with Project’ and ‘Yes’ to confirm you want to open the file.

Click Skip Intro.

Any existing tasks will be imported into Project. Here, you can update the WBS as needed, including adding new tasks, moving dates, and assigning task owners.
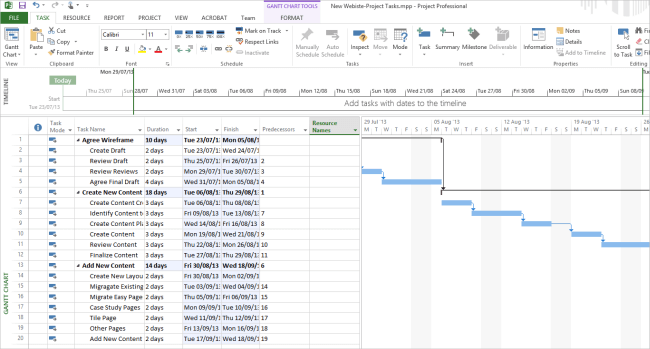
To sync the updates to the SharePoint project site, just click Save! (click the save icon in the top left or click Ctlr-S on your keyboard).
To update the project again, and pull in any updates team members have made to their tasks, click the Open with Project button or open the project file from the Recent Projects view.

Editor’s Note: This post was originally published in July 2013 and has been updated for freshness, accuracy, and comprehensiveness

