How to Create a Channel in Microsoft Teams
Follow the instructions shown on the right, or follow the more detailed instructions below.
Step-by-Step Instructions: How to Create a Channel in Microsoft Teams
- Open Microsoft Teams: Launch the Microsoft Teams application on your desktop or navigate to it via a web browser.
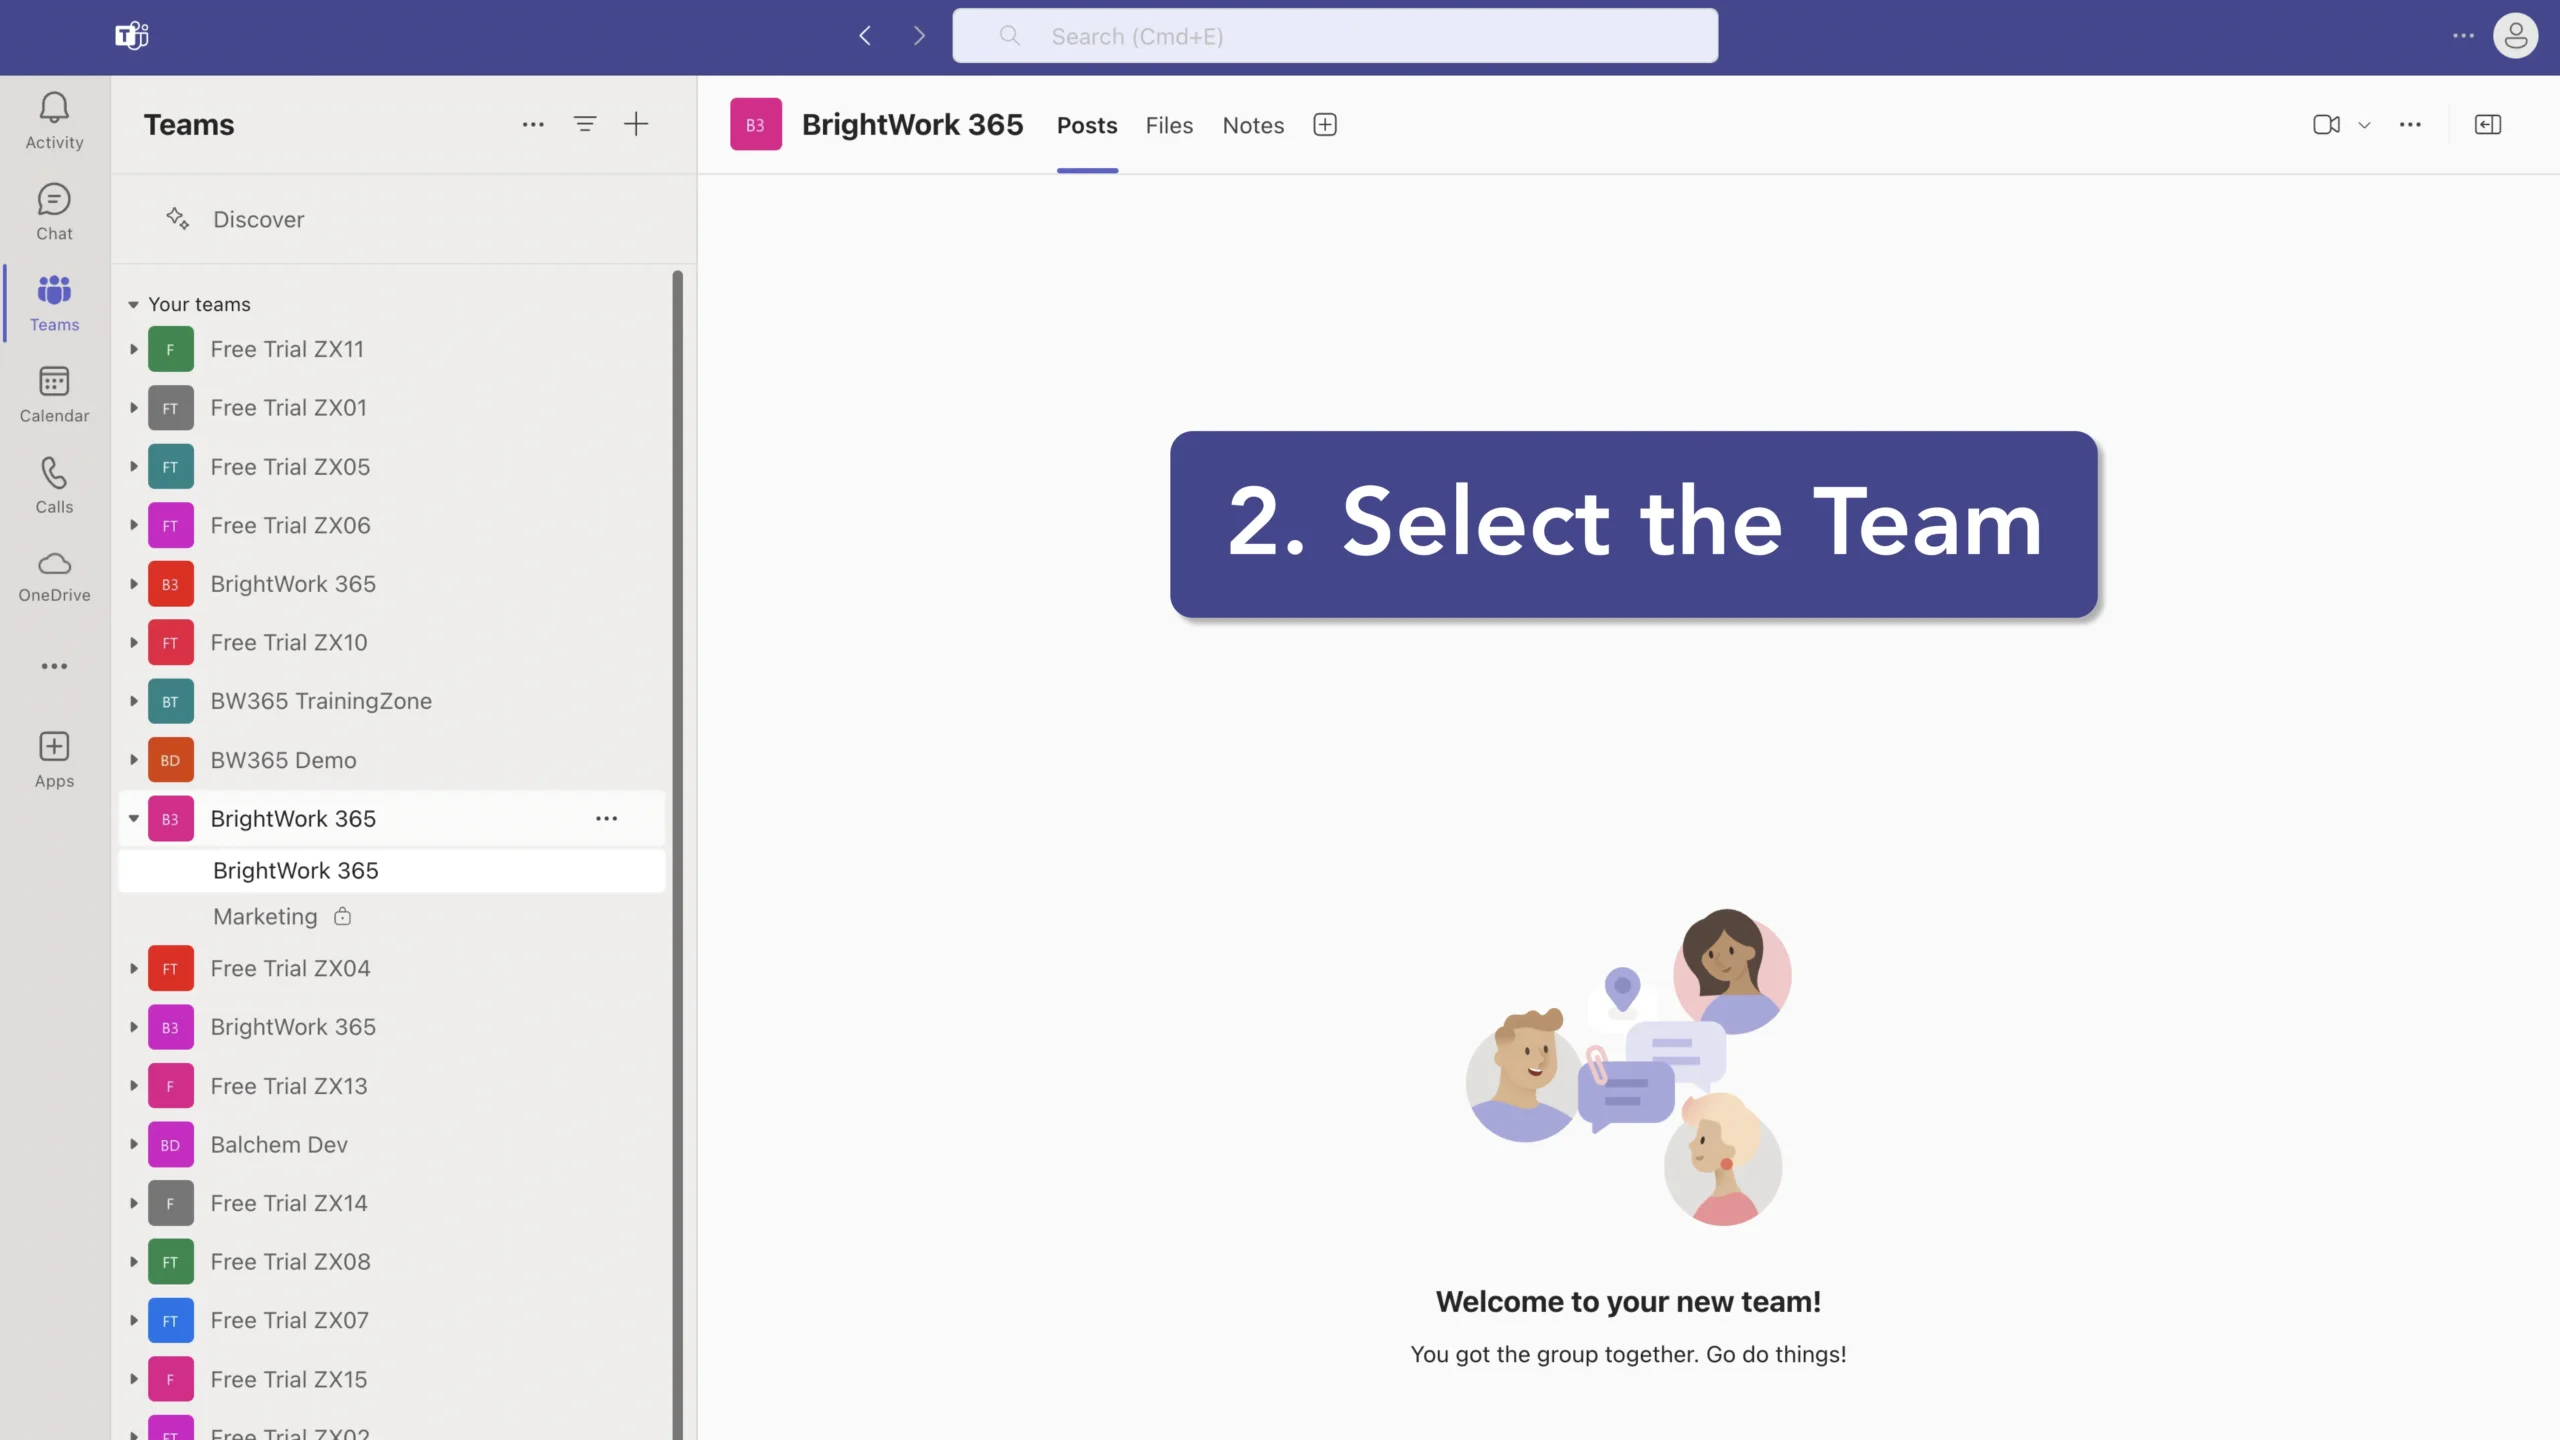
- Select the Team: Navigate to the team where you want to create a new channel. You can find your teams listed on the left-hand side of the Teams interface.
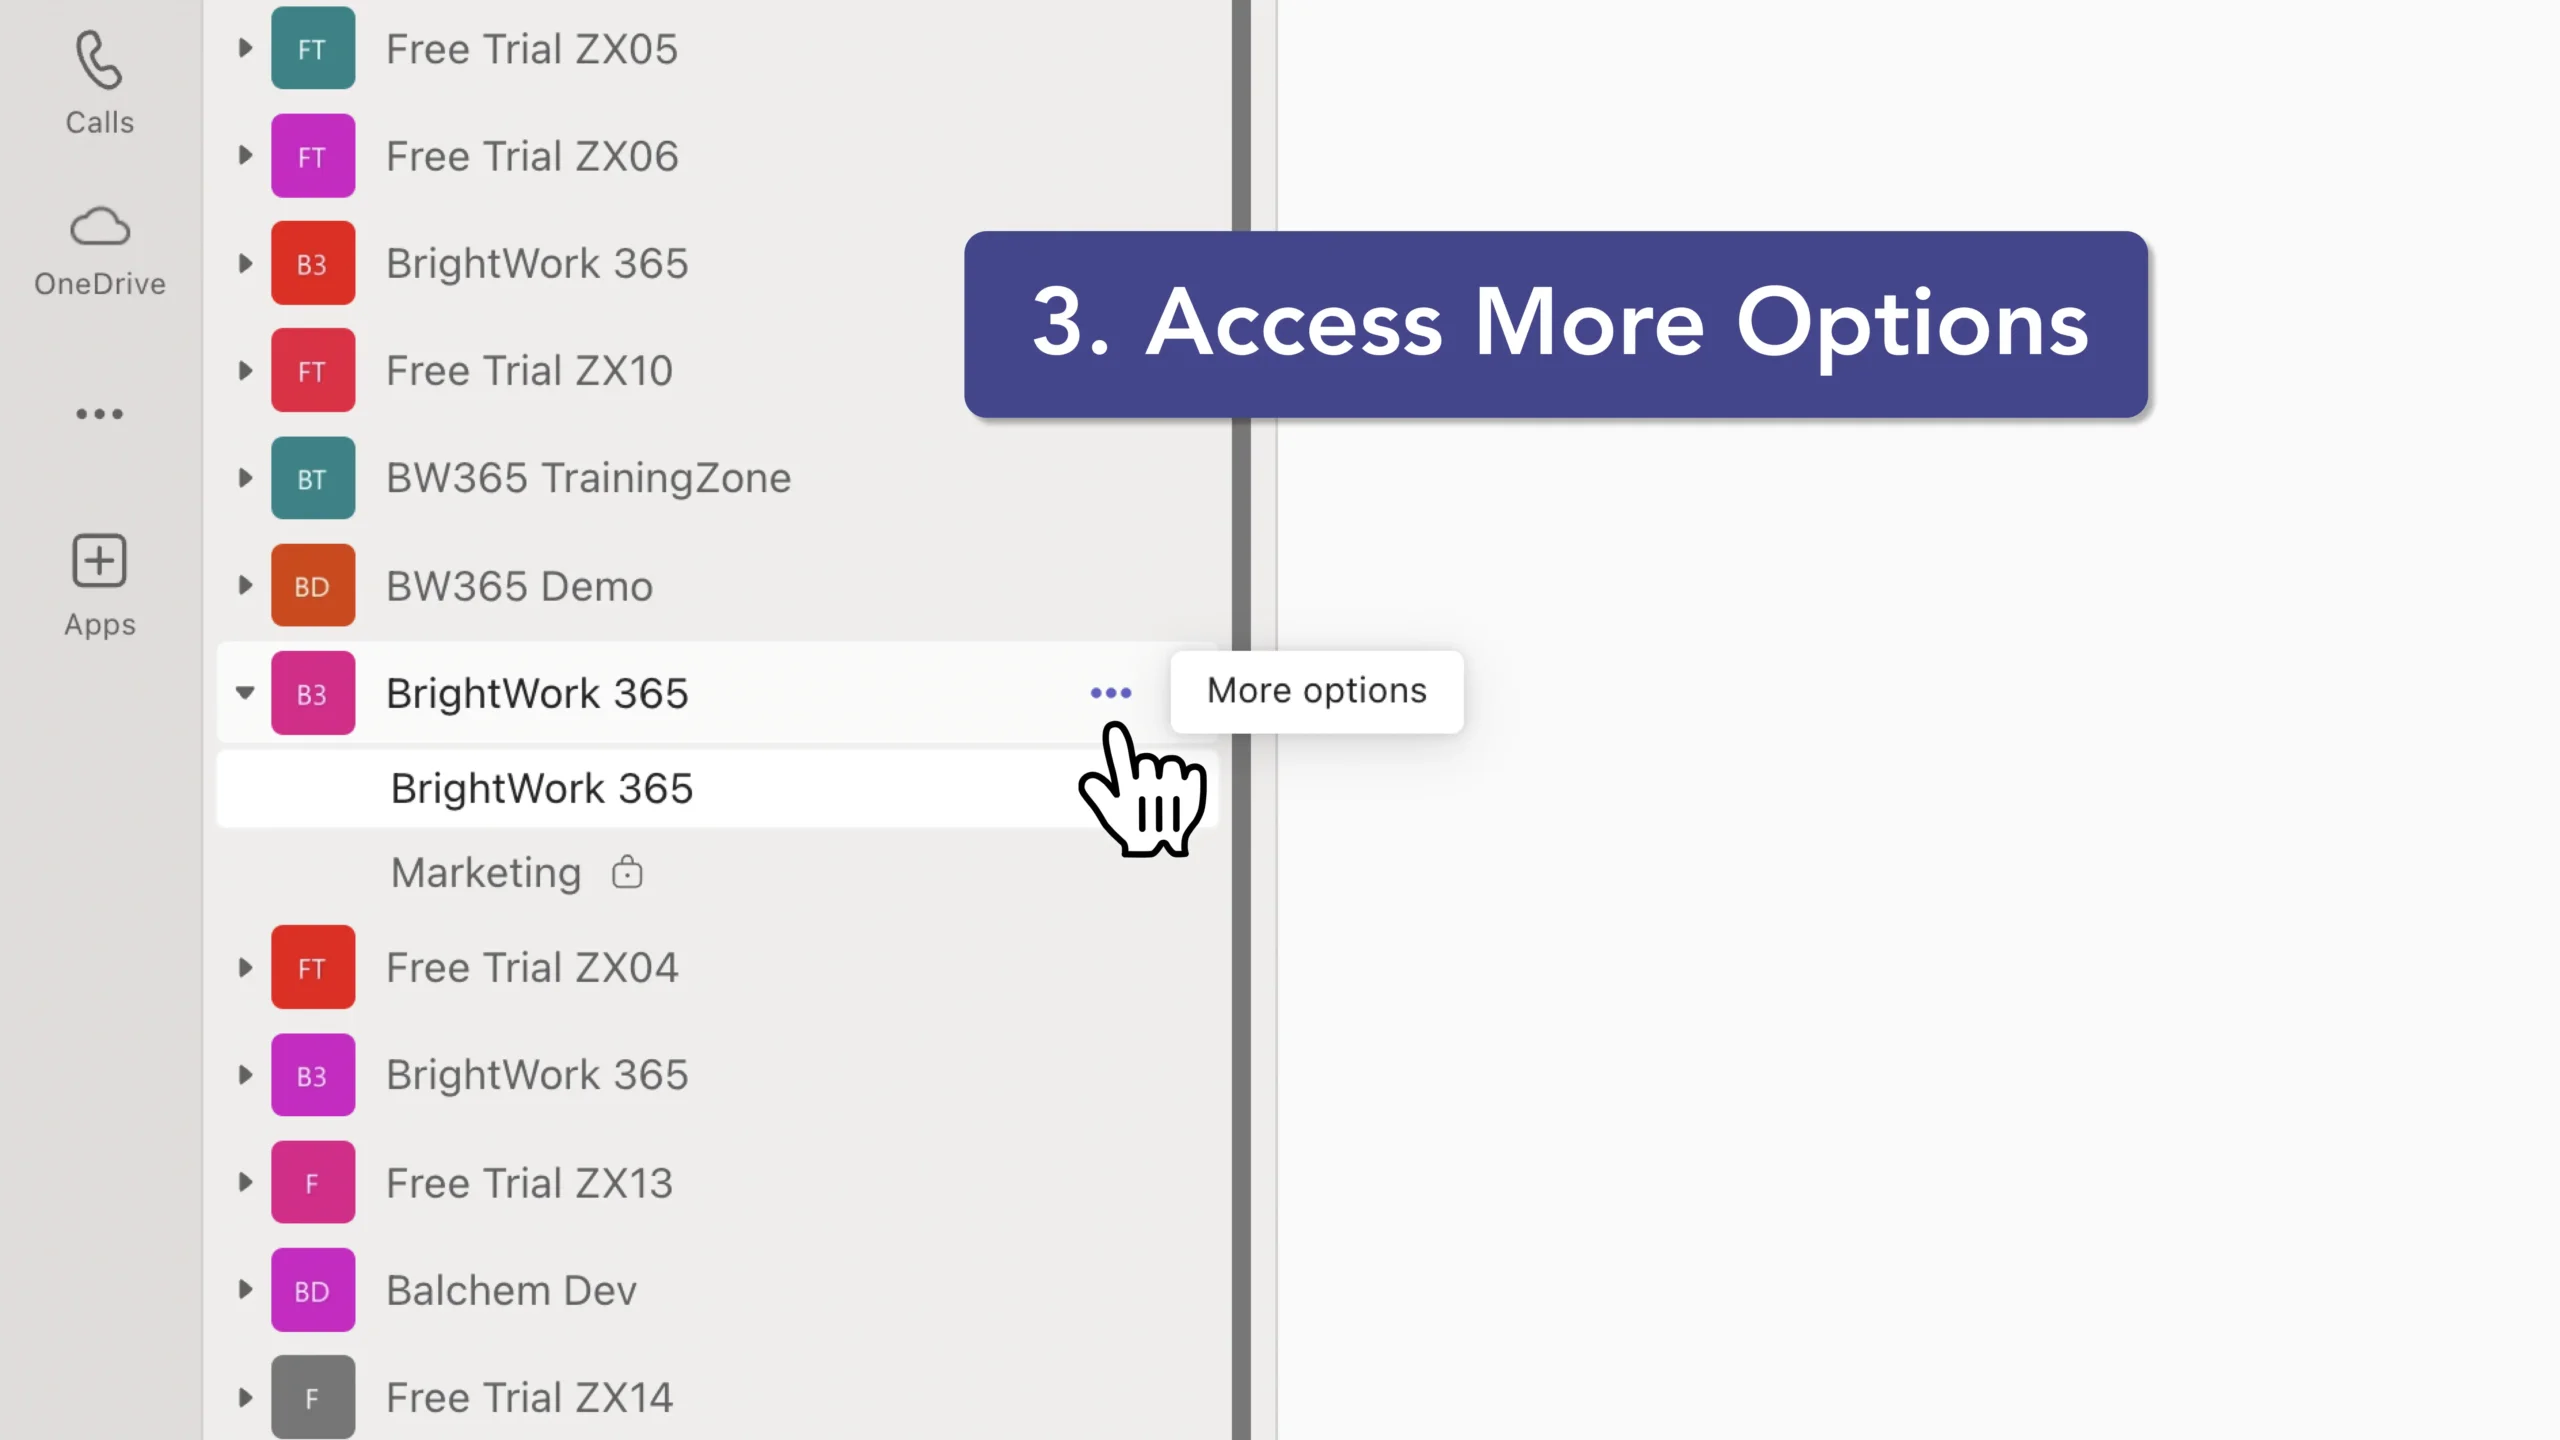
- Access More Options: Click on the three dots (ellipsis) next to the team name. This action will open a menu with additional options.
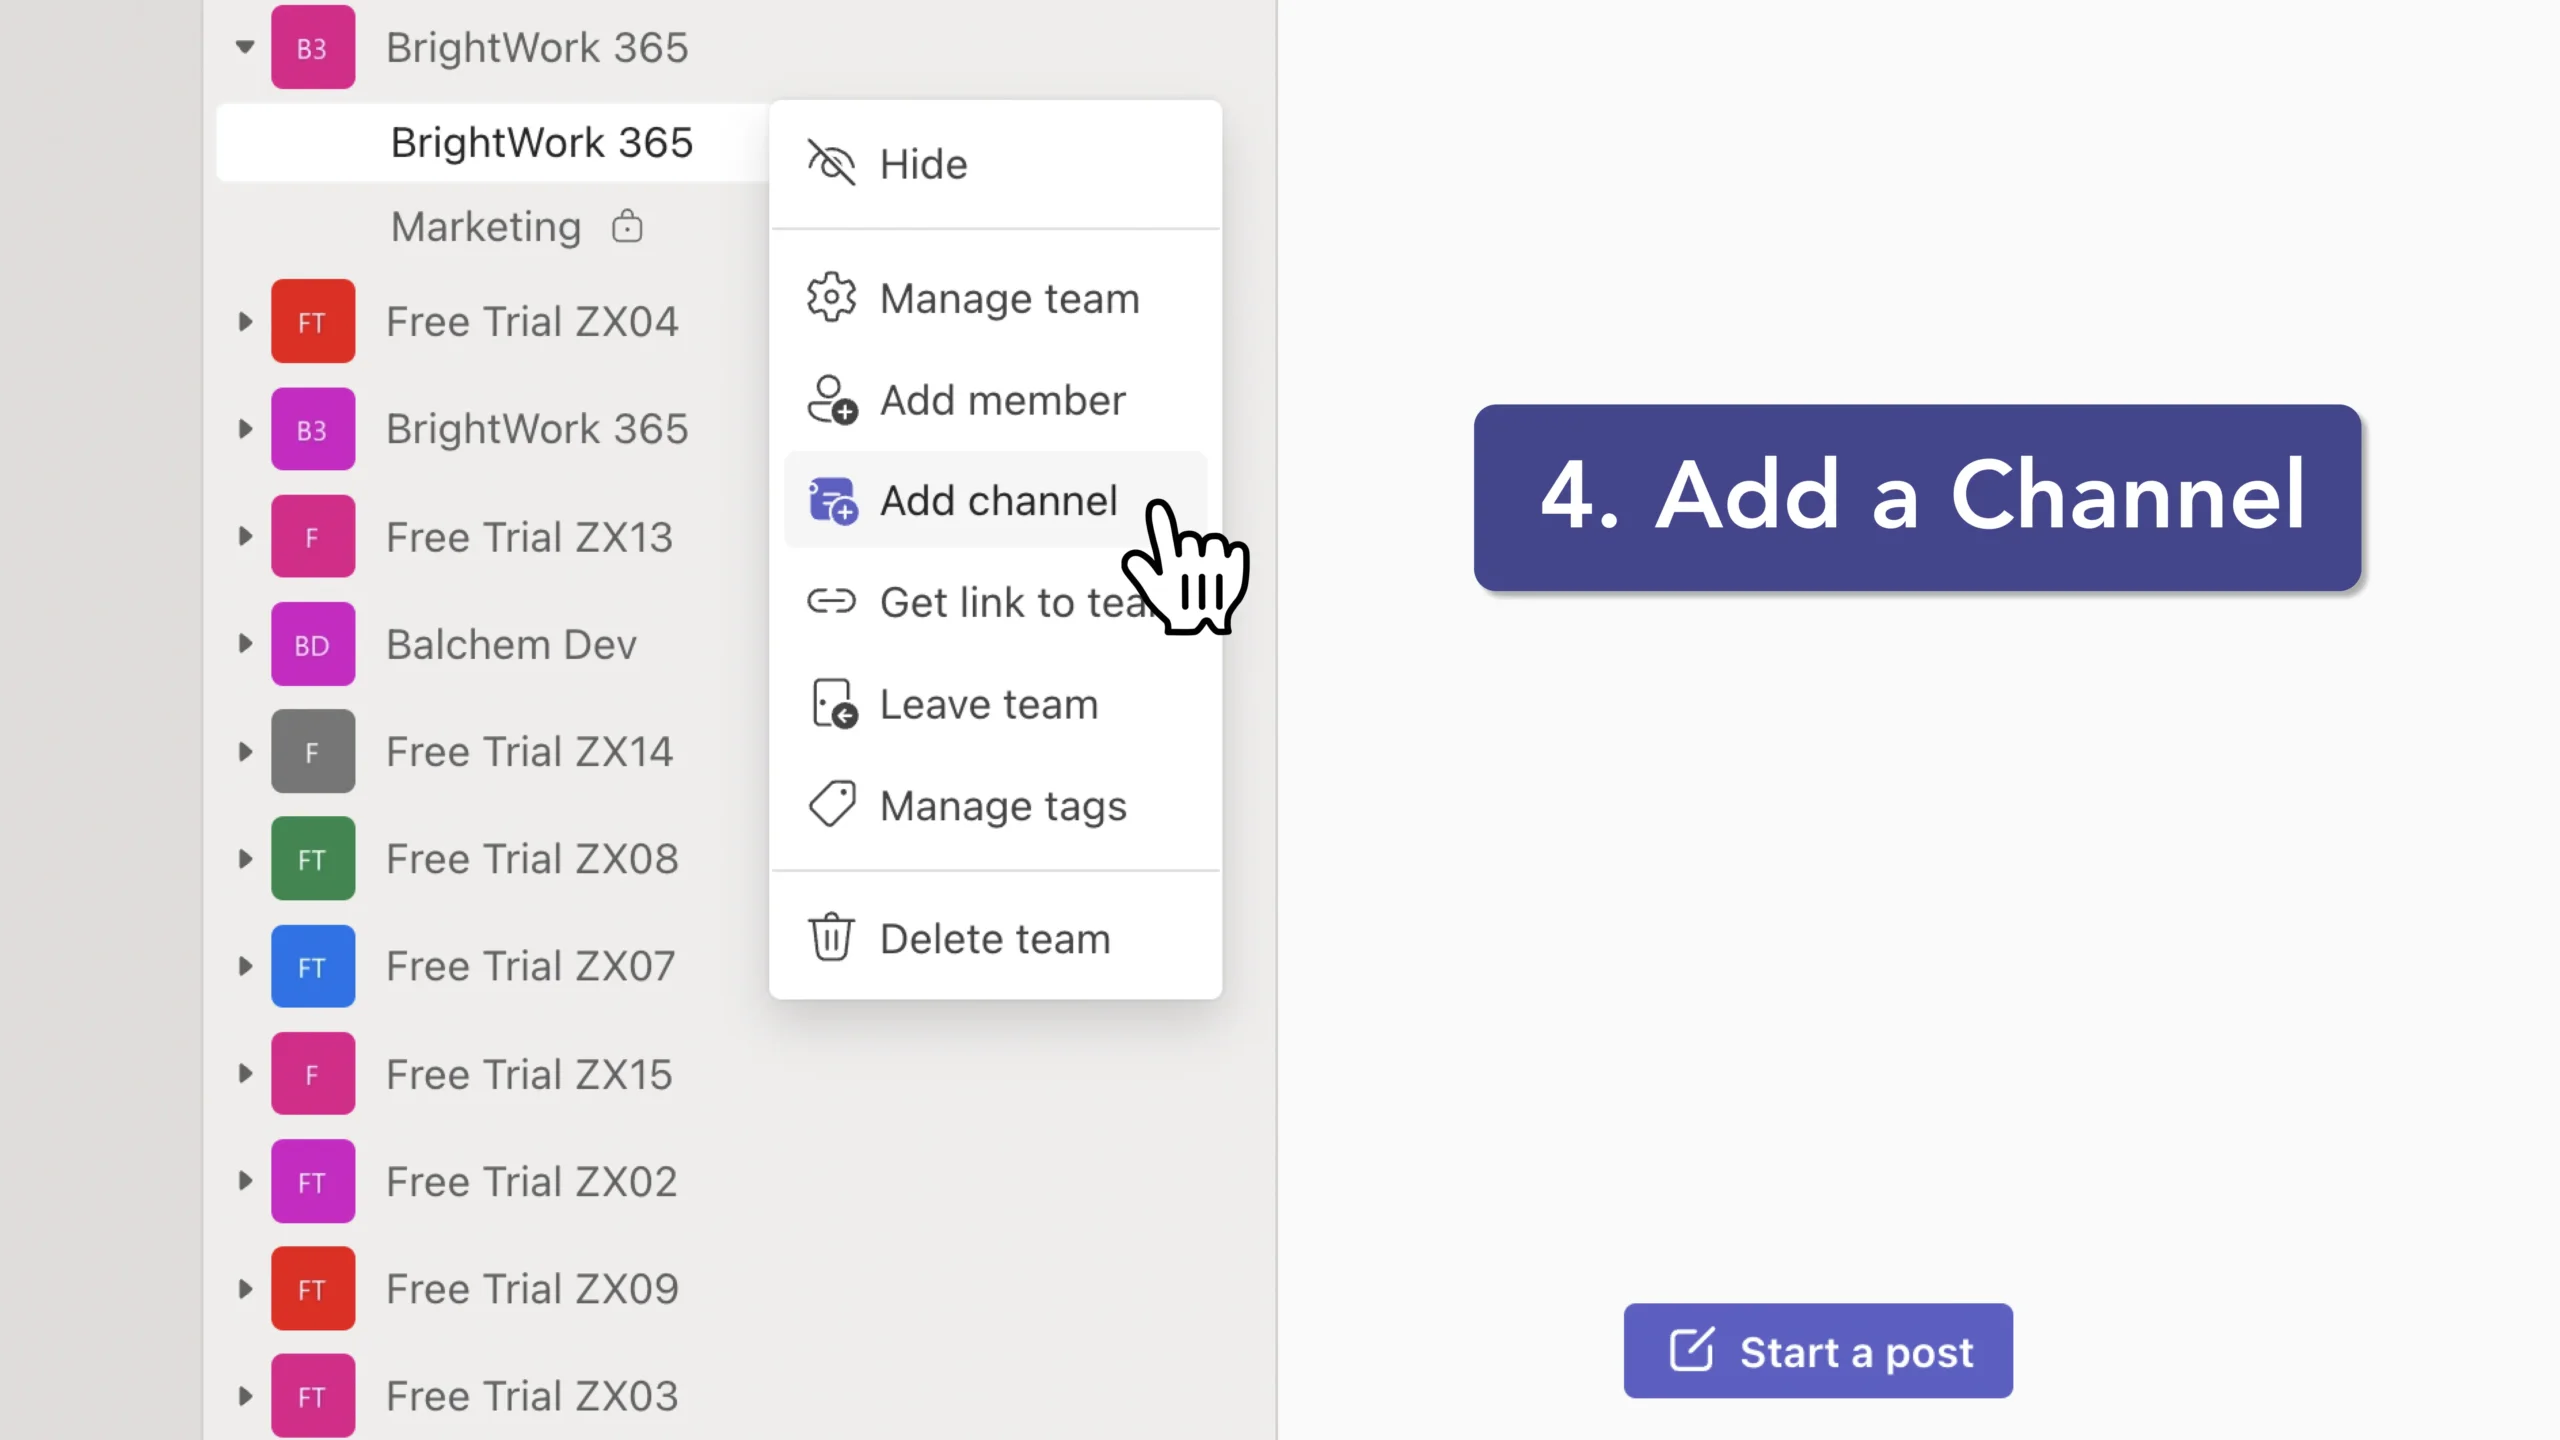
- Add a Channel: From the menu, select “Add channel”. This will open a window where you can configure your new channel.
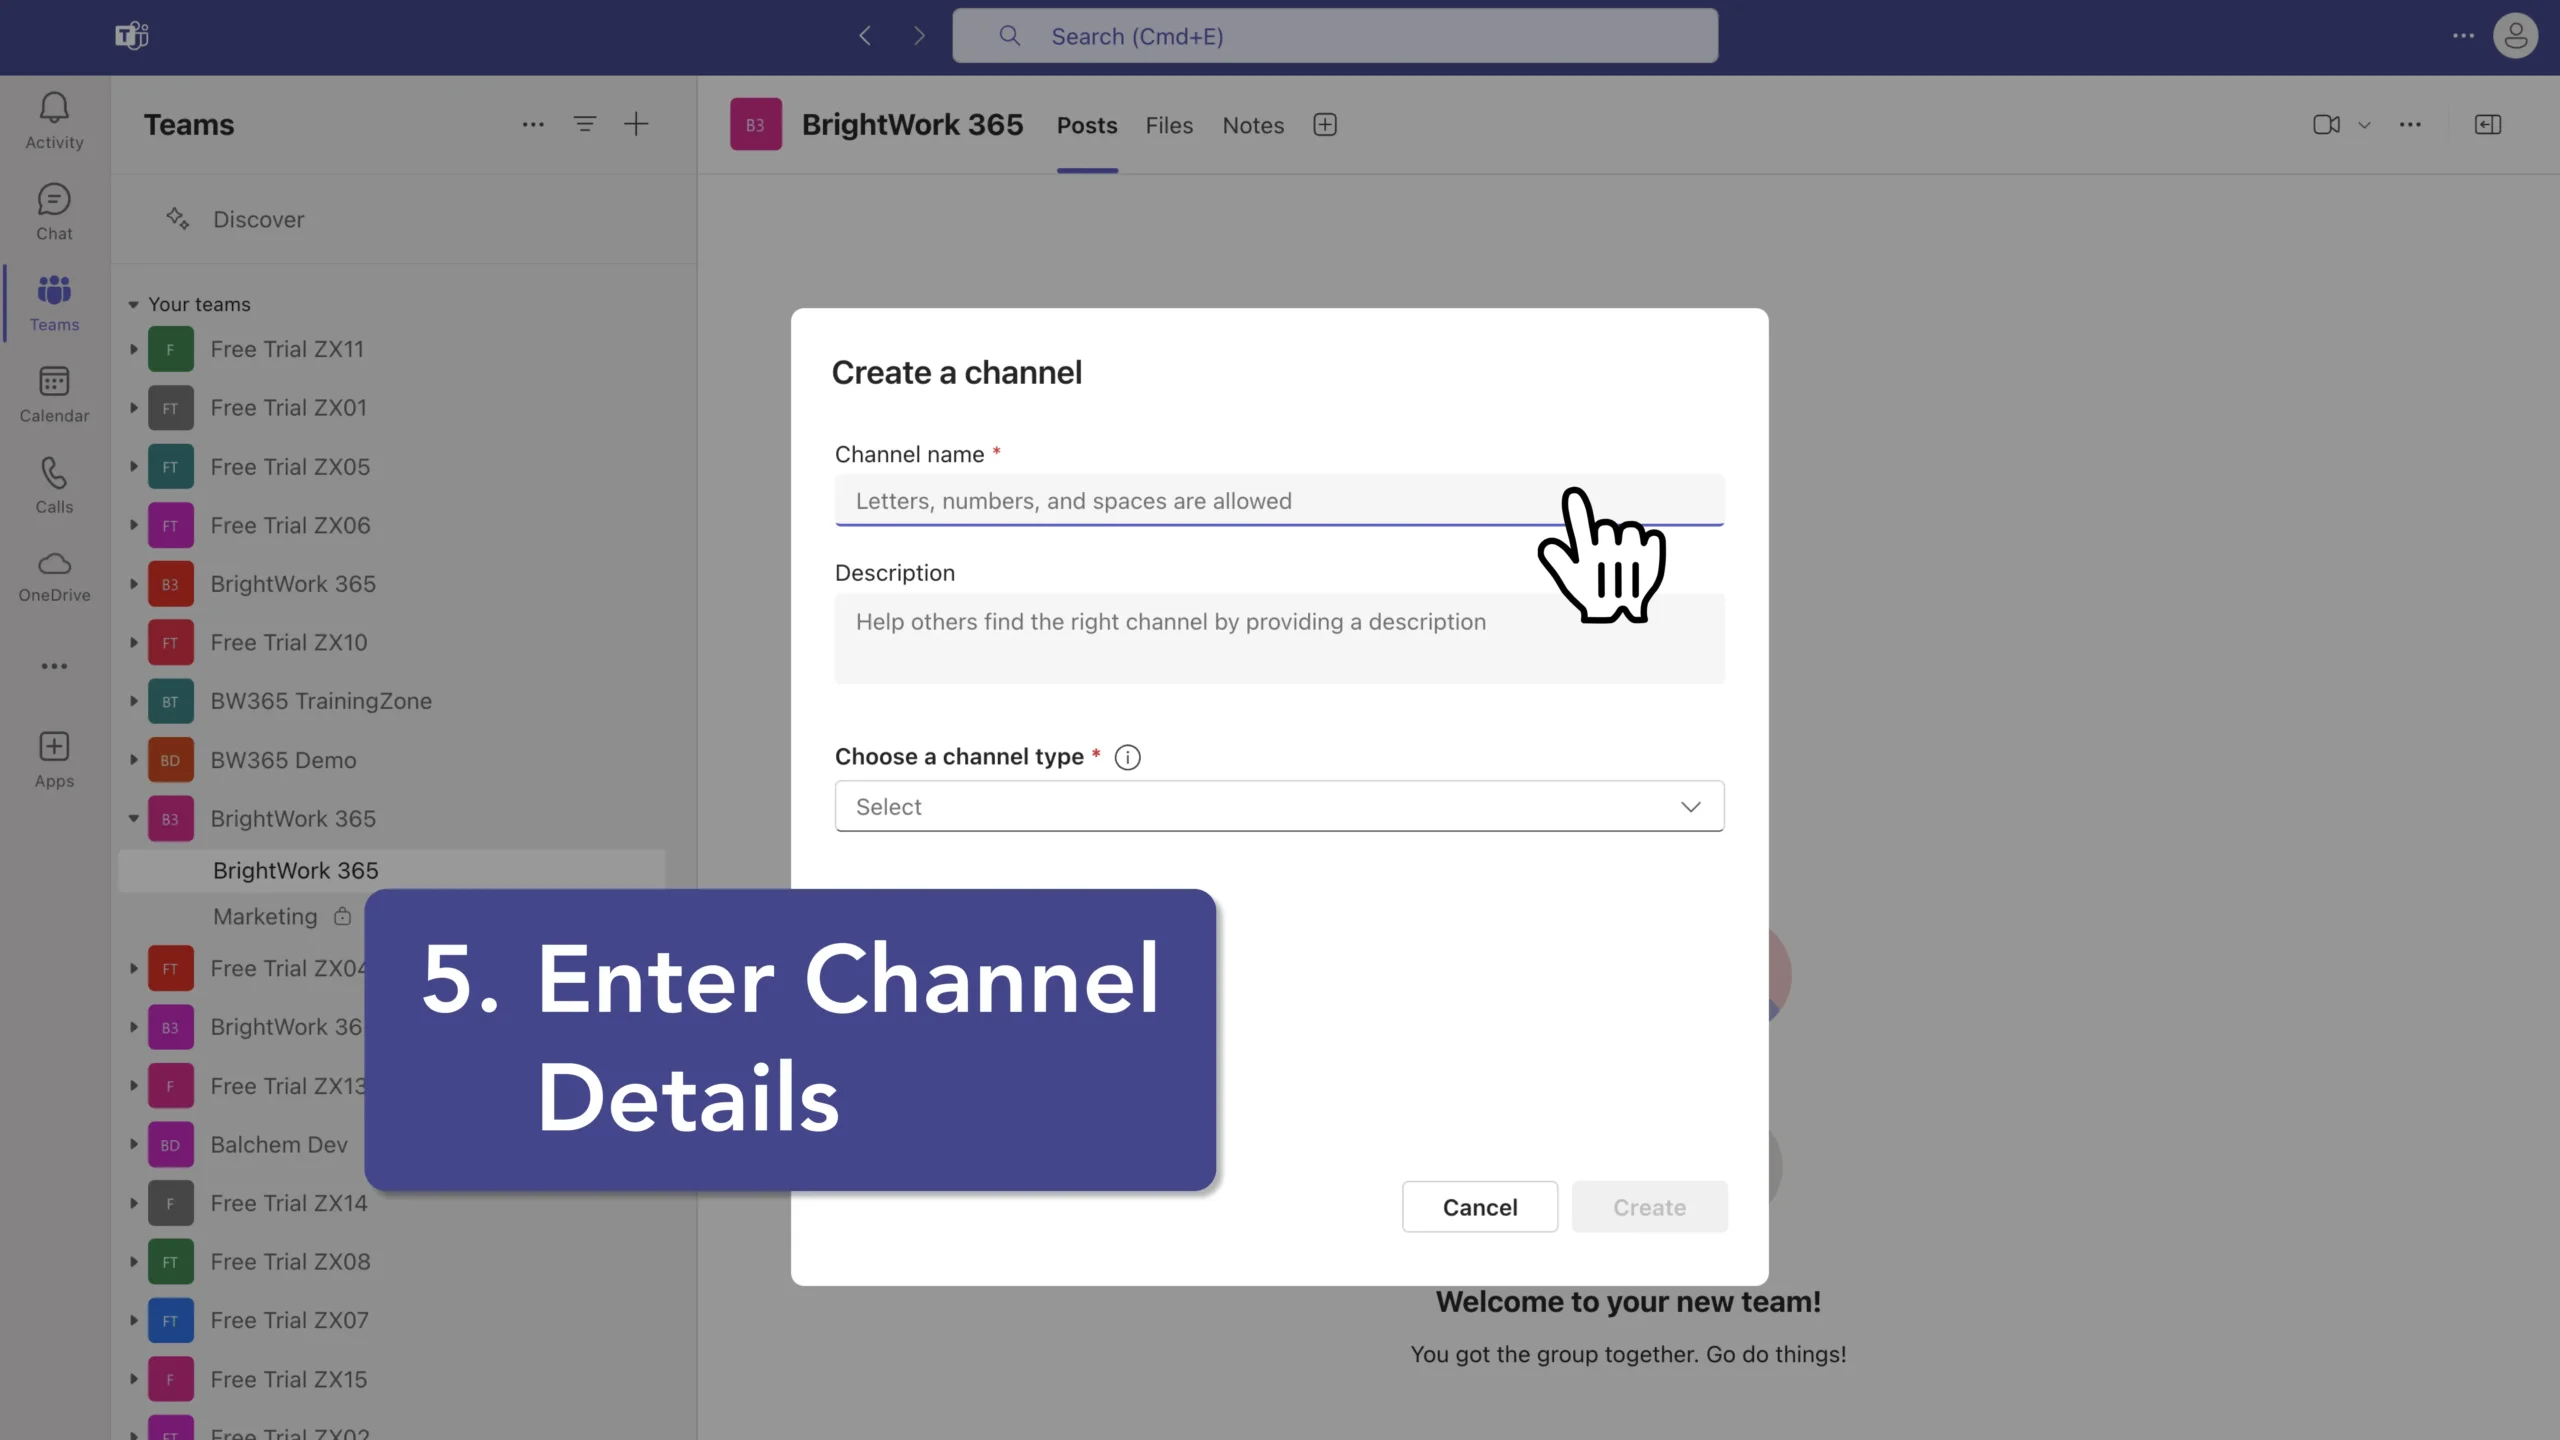
- Enter Channel Details: Name: Provide a name for your channel. This is required. Description: Optionally, add a description to inform team members about the channel’s purpose.
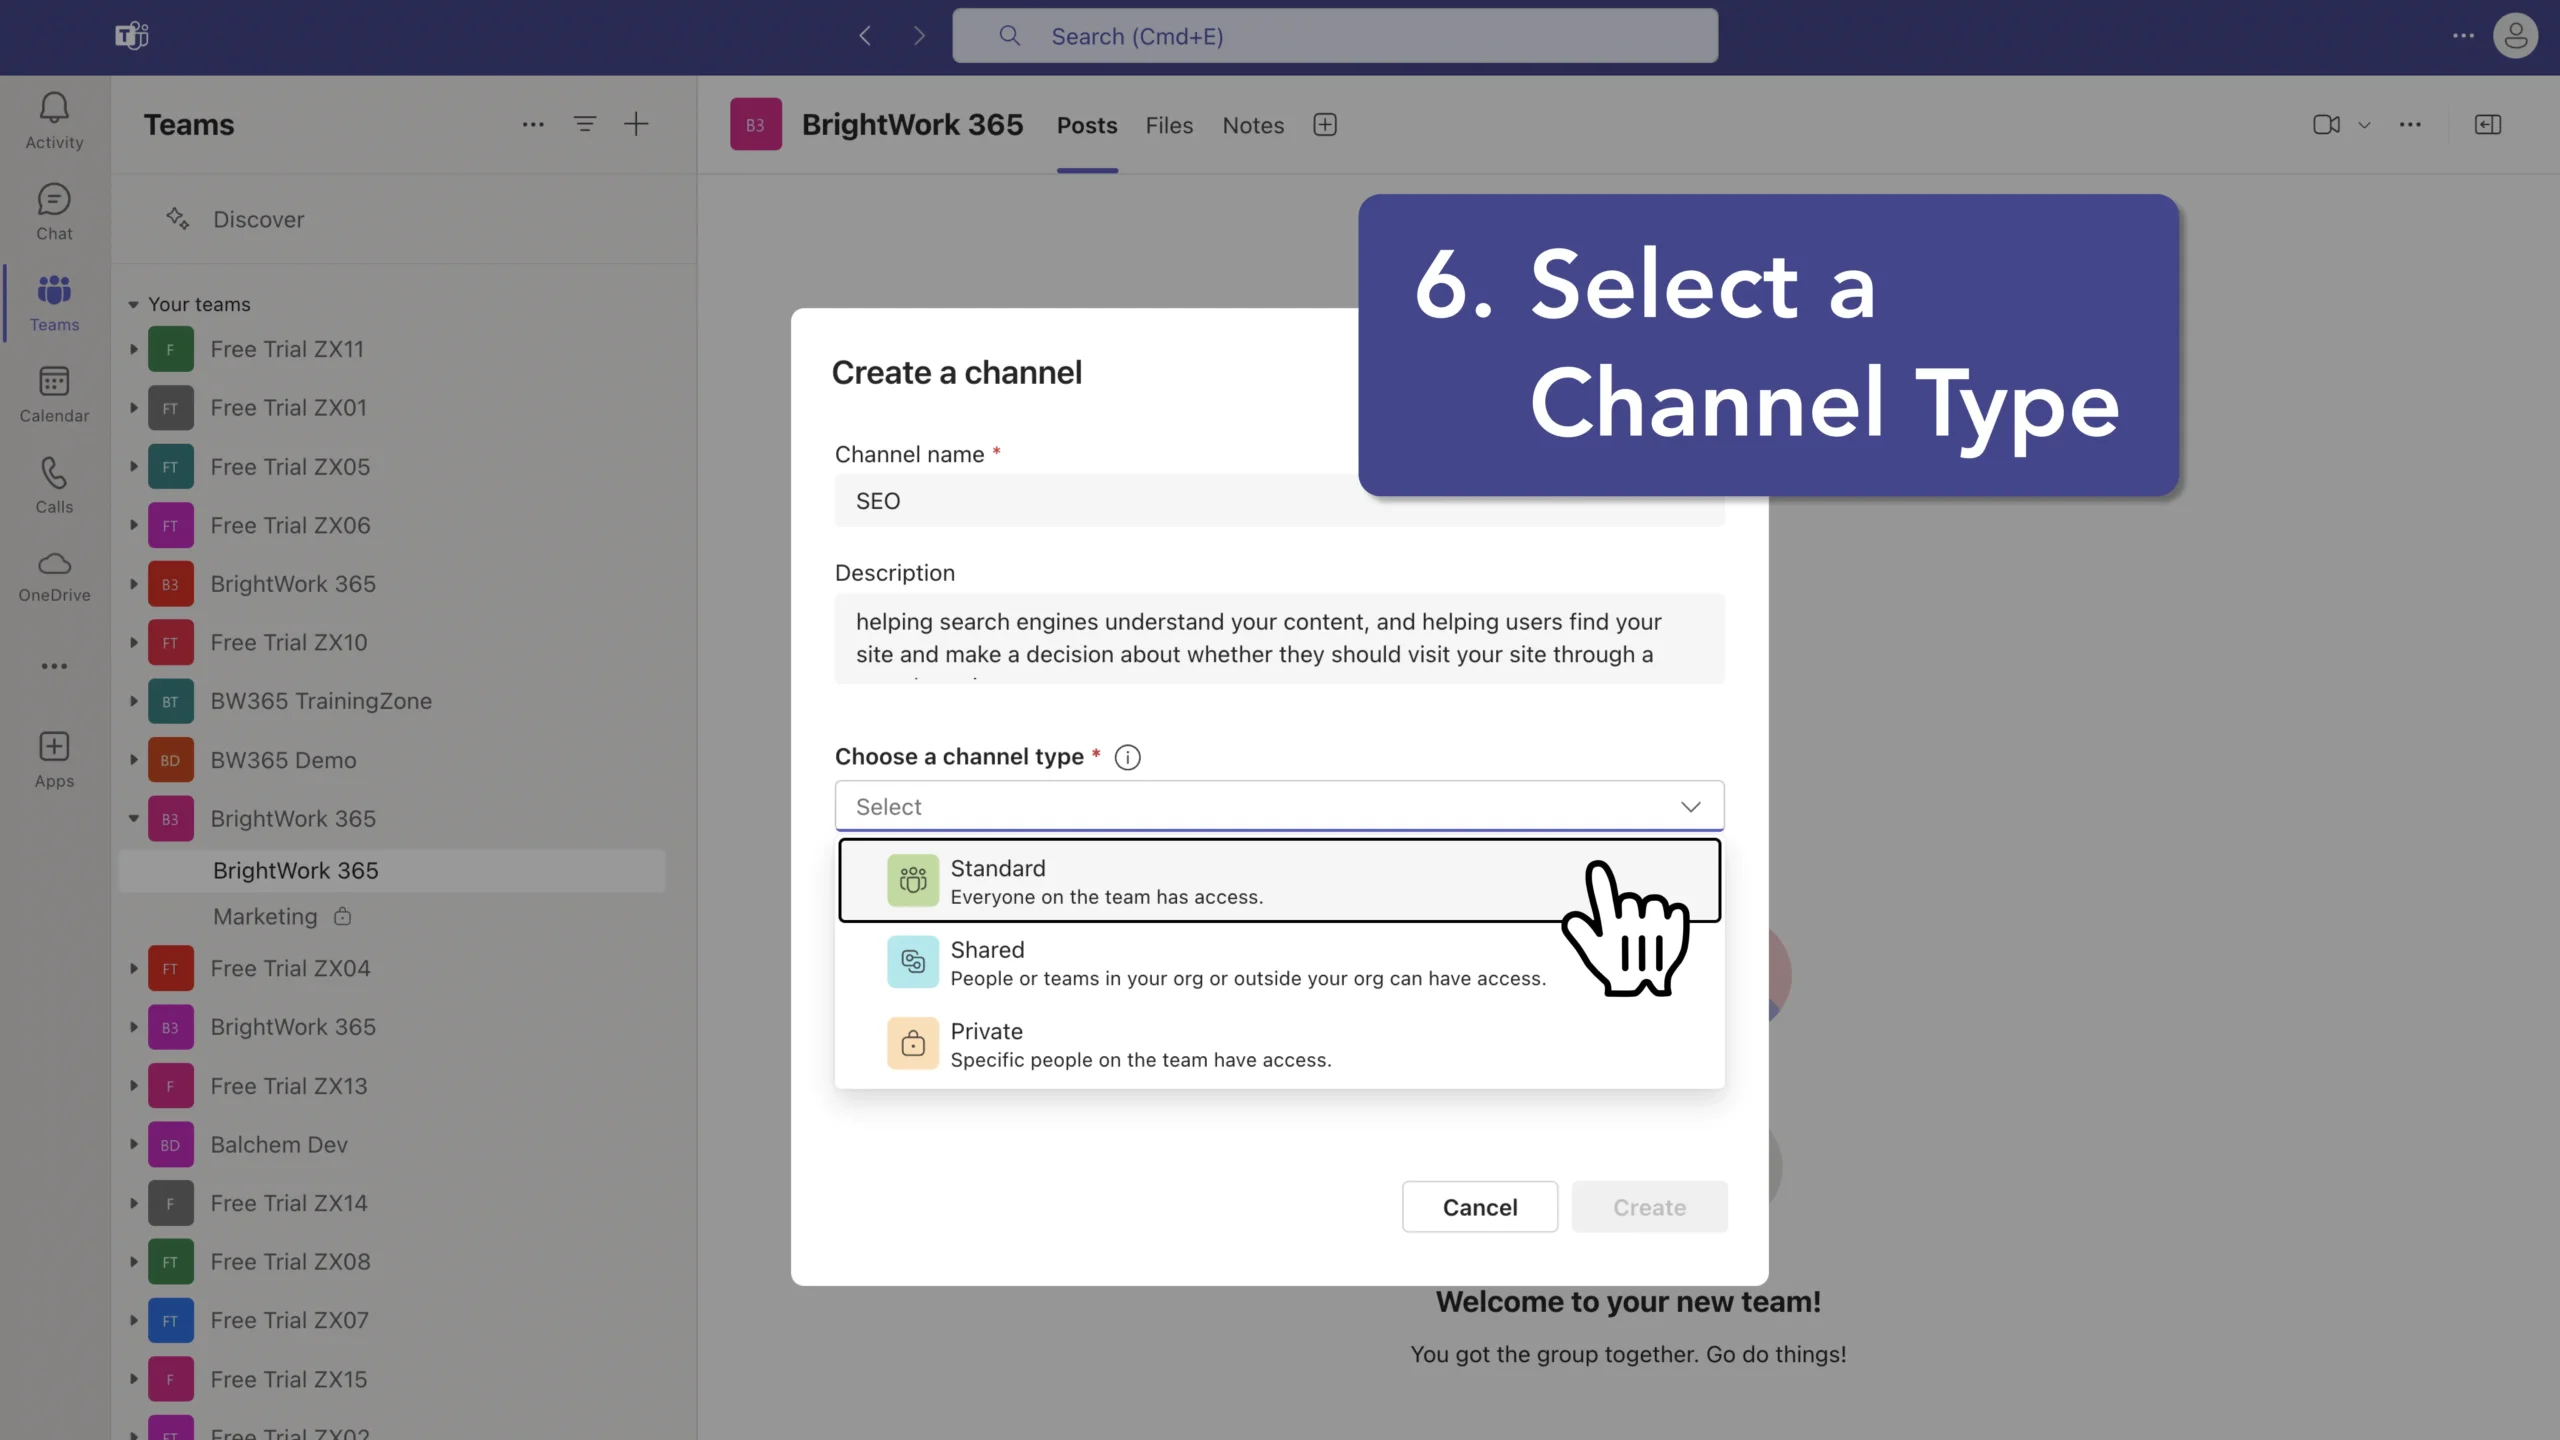
- Select a Channel Type: Standard Channel: Accessible to everyone on the team. Ideal for general topics and discussions. Private Channel: Restricted to specific team members. Suitable for sensitive or confidential topics. Shared Channel: Allows collaboration with people outside your team ororganization. (Visibility Options: For standard channels, you can choose to automatically show the channel in everyone’s channel list. If this option is not selected, the channel will be hidden by default.)
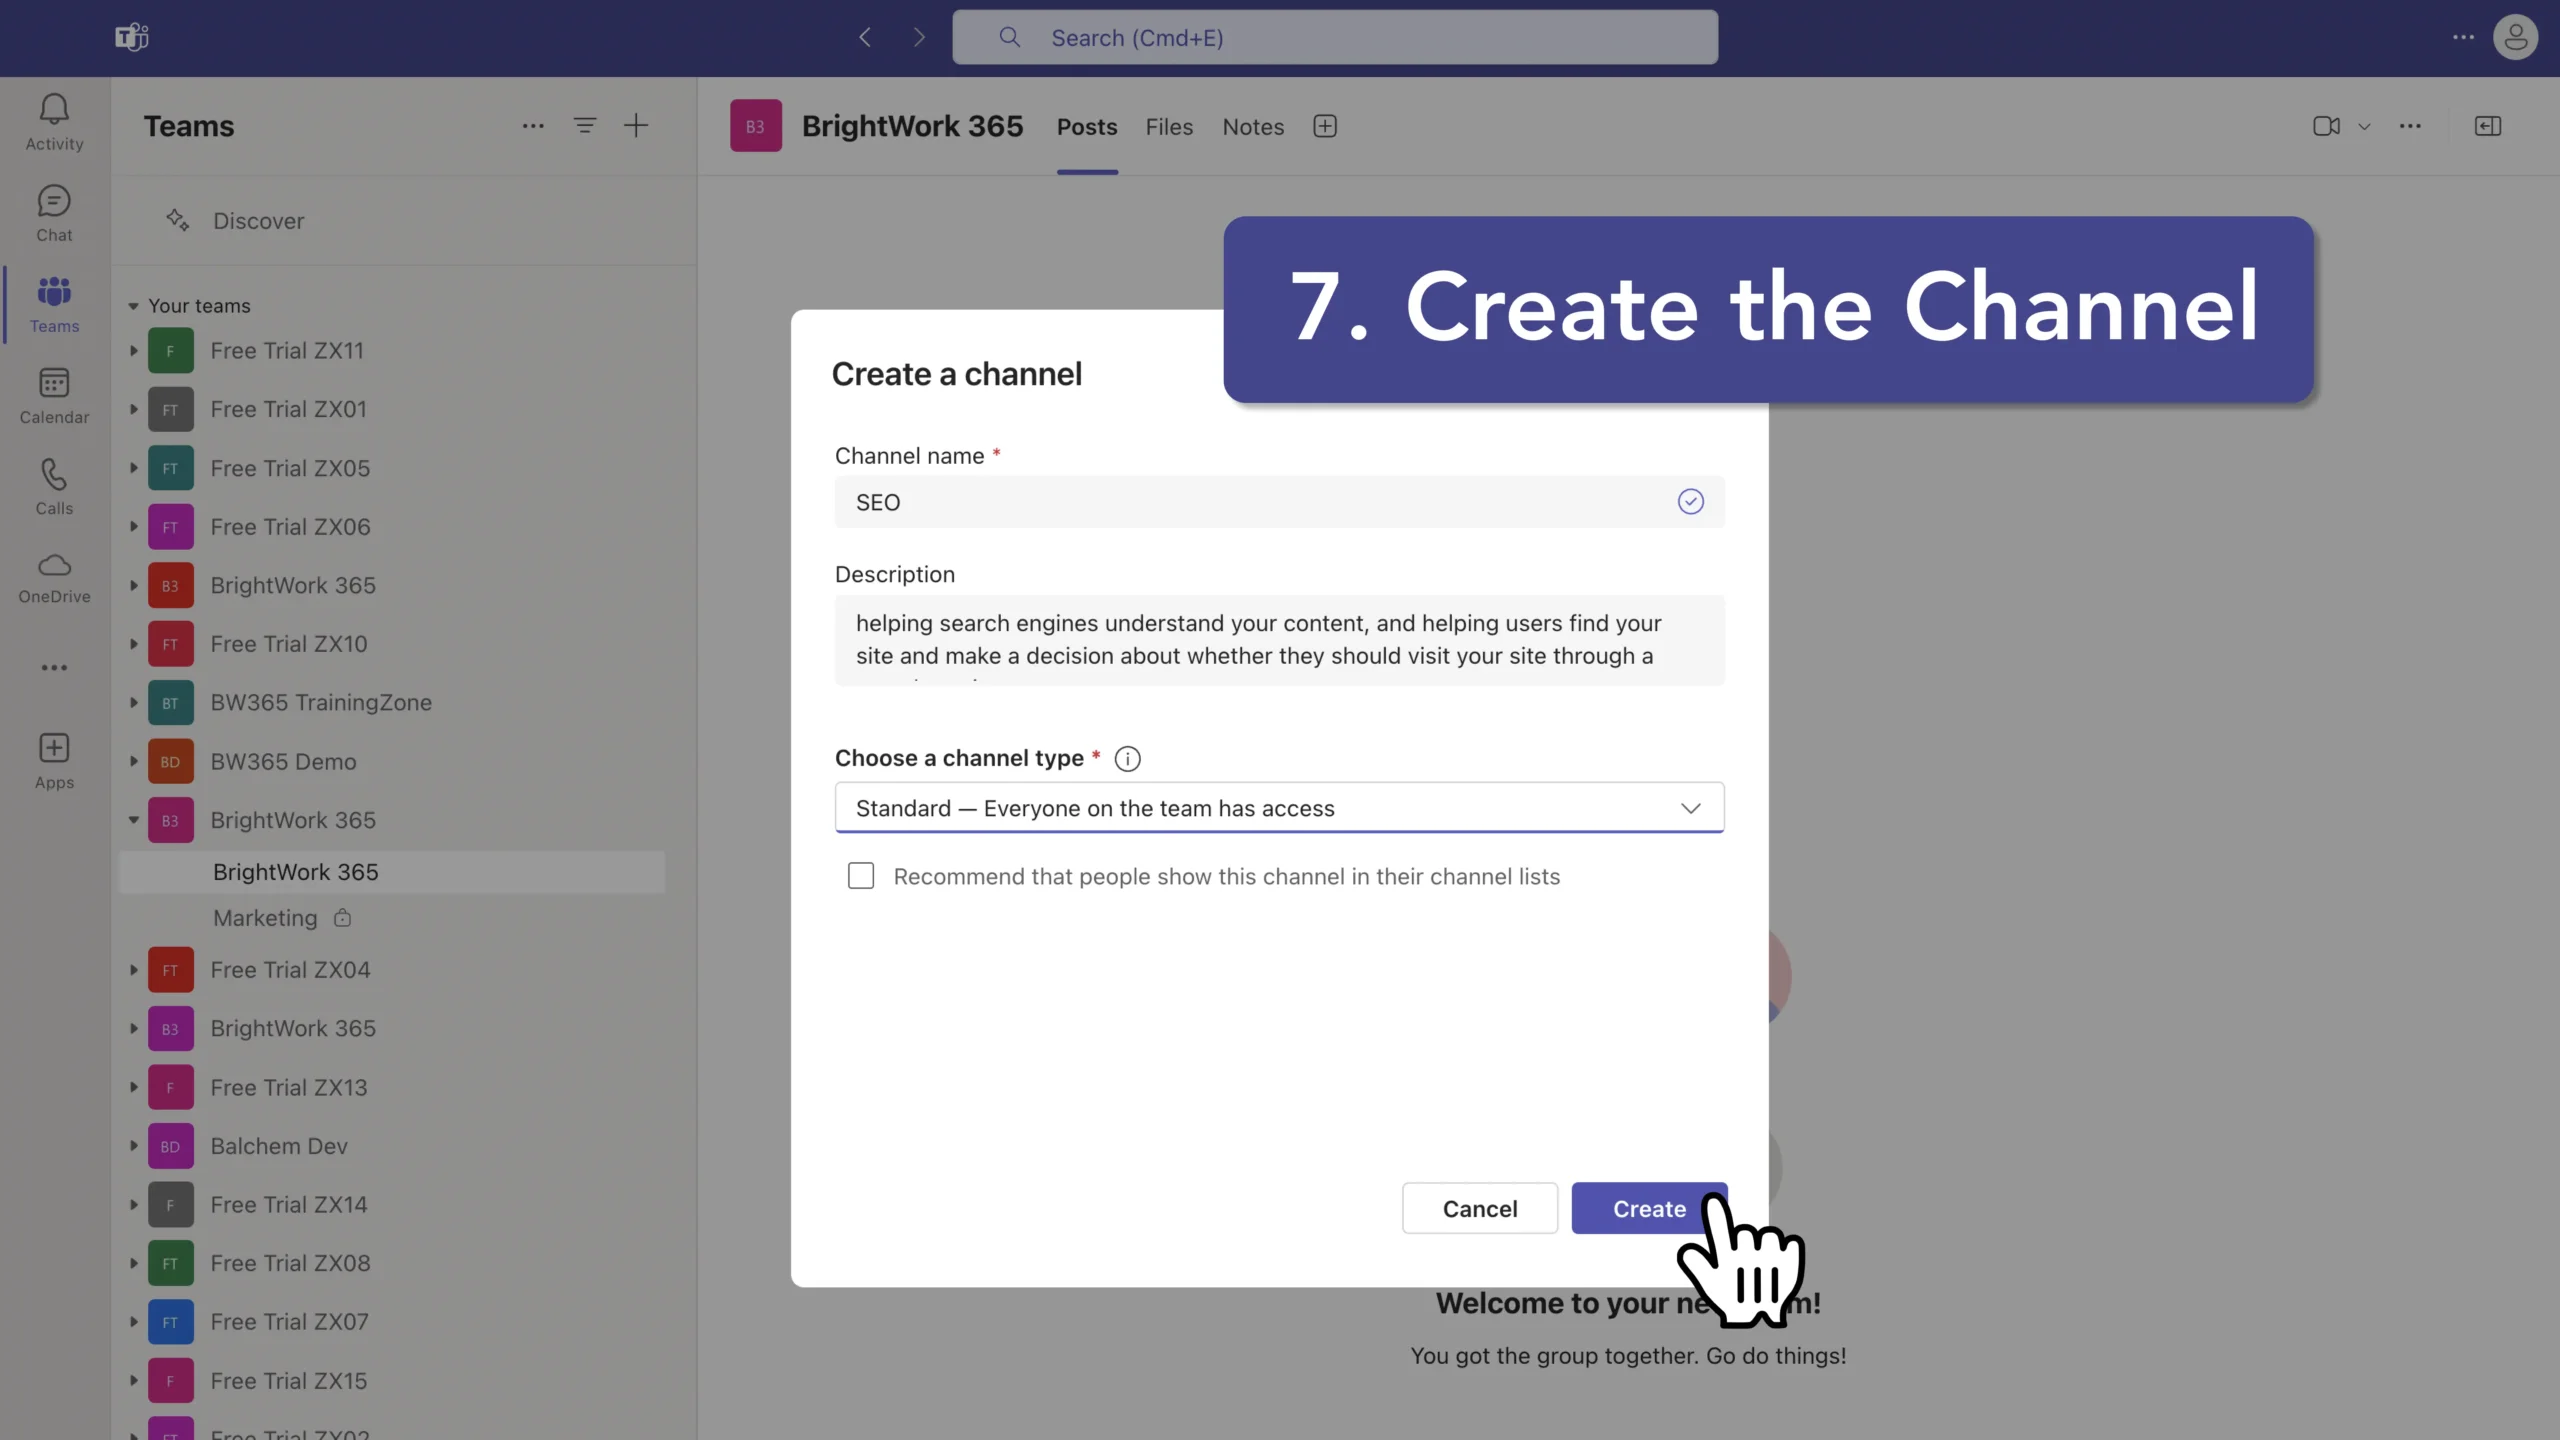
- Create the Channel: Click “Add” to finalize and create the new channel. It will now appear in the list of channels under the selected team.
By following these steps, you can efficiently create channels in Microsoft Teams, enhancing your team’s ability to focus on specific topics, projects, or departments. Channels help in organizing conversations and ensuring that team members can collaborate effectively on shared tasks and initiatives.

